 English
 CN
 ES
 86-573-88890126
Installation Engineering
A premium print can look flawless on the production floor and still fail within weeks on site. In most cases the cause is not the substrate but how the piece was mounted, tensioned and protected against wind. Correct installation is what decides whether a flex banner stays bright, flat and readable for years instead of sagging, cracking or tearing.
This guide walks through the full installation chain in the order a professional crew would follow: choosing the right weight for the site, preparing the surface, controlling tension, designing for wind, reinforcing edges and grommets, and maintaining the banner through seasonal change. Each stage contains practical limits you can check on site rather than general advice.
1. Matching Flex Banner Specifications to the Installation Site
Specification errors are the most expensive mistakes because they cannot be fixed after mounting. Before any frame or cable is touched, confirm the exposure type, the expected life and the viewing distance. These three factors determine the weight, the coating and whether a front-lit or backlit material is appropriate.
Weight (GSM) Selection by Exposure
Grams per square metre is the simplest indicator of how a substrate will behave under tension and wind. Heavier material resists creasing and stretch but adds load to the frame.
| Application | Typical Weight | Key Requirement |
|---|---|---|
| Indoor short-term promotion | 240 to 340 gsm | Front-lit, smooth finish |
| Outdoor temporary signage | 340 to 440 gsm | Basic UV protection |
| Outdoor long-term hoarding or billboard | 440 to 510 gsm or higher | Reinforced UV and tear resistance |
| Light box or backlit display | Backlit flex banner (translucent) | Even light transmission |
Surface Compatibility Check
The mounting surface defines the fixing method. A banner held by the best tension system still fails if it is anchored to a substrate that cannot take the load.
- Concrete and brick walls require expansion anchors and a pre-drilled frame, never adhesive alone.
- Glass and smooth metal need a degreasing cleaner before fixing, because surface film reduces adhesion under sustained tension.
- Reusing an old banner frame is acceptable only where the earlier print has no remaining ink coverage, and a small adhesion test should be run first.
2. Surface Preparation: The Step Most Crews Skip
Preparation takes minutes but determines whether the bond between banner and frame remains stable through temperature cycles. Skipping it is the most common cause of premature edge lifting.
Cleaning Protocol
- Wipe the mounting area with a mild neutral detergent to remove dust and grease.
- Follow with a second wipe using isopropyl alcohol to remove residual surfactant films.
- Allow the surface to dry fully before the banner is placed.
High-pressure washing before installation should be avoided. Strong jets force water into micro-cracks in the PVC coating, where it can freeze, expand or weaken the bond over time.
Temperature and Acclimatisation
Material delivered from a cold vehicle should rest at the site temperature for at least an hour before unrolling. This prevents the coating from being stretched while it is still stiff.
3. Tensioning Systems: Achieving a Taut Surface Without Overstretching
A well-installed flex banner should look flat with no visible ripples, yet it must not be pulled beyond the material's elastic range. The right tension depends on the mounting system and the banner width.
Choosing the Mounting Method
Fixed Steel or Aluminium Frame
Used for permanent shopfronts and building wraps. Recommended tension around 20 to 30 N per linear metre.
Wire Rope Tensioning
Suited to large billboards and highway hoarding. Recommended tension around 35 to 50 N per linear metre.
Fence or Scaffold Lashing
Used for temporary site hoarding. Recommended tension around 15 to 25 N with cable ties or lashing straps.
The 3 Percent Elongation Limit
The practical rule is that total stretch should not exceed about 3 percent of the original dimension. Beyond this point the polyester yarns in the base fabric move into plastic deformation. Once the load is released, they do not return, and the banner sags permanently and flaps more readily in ordinary wind.
On a banner wider than 4 metres, always fit a turnbuckle or ratchet tensioner so that the final adjustment can be made in small, measured steps.
4. Wind Load Engineering: Preventing Catastrophic Failure
Wind is the dominant cause of banner failure outdoors. A flat sheet presents its full area to the airflow, and the force it generates grows with the square of wind speed, which means small increases in gusts have a large effect on anchor loads.
Simplified Wind Force Estimate
For planning purposes, the force on a flat banner can be estimated with the standard drag relationship in which air density, wind speed, exposed area and a drag coefficient are combined. For a flat banner the drag coefficient is commonly taken as 1.2, which is a conservative value for planning anchors.
Worked example: A 3 by 2 metre banner exposed to a 70 km/h wind experiences roughly 1,660 N of force, or about 169 kgf. Anchor points should be sized with a safety factor of at least 3 to 1.
Mitigation Techniques That Keep the Image Intact
Several design measures reduce wind load without sacrificing the visual impact of the graphic. The most common are listed below.
| Technique | How It Works | Best Use |
|---|---|---|
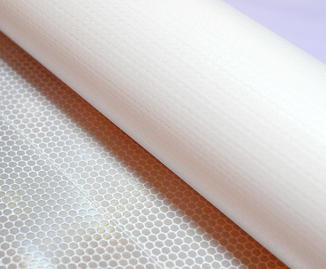
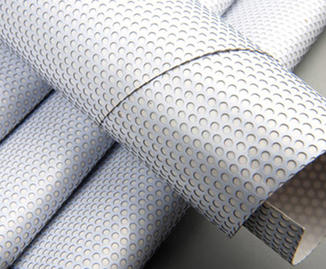
| Ventilation holes | Small openings spaced across the surface let air pass through | Large single-face banners |
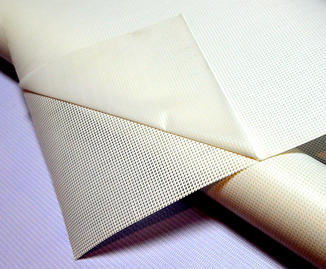
| Mesh flex banner | Open weave allows air to pass and lowers the load significantly | Exposed coastal or open-field sites |
| Double hem with rope edge | Reinforces edges where peak stress concentrates | All outdoor installations |
5. Grommet and Hem Best Practices
Edges and attachment points carry the concentrated loads of the whole banner. Most tears begin at a grommet or along an unfinished cut, so these details deserve the same attention as the tension itself.
Grommet Spacing That Survives Wind
Spacing should be tighter as exposure increases. Standard installations work well at up to 50 cm between grommets, while windy districts benefit from 40 cm or less. Wide gaps leave long unsupported spans that flutter and eventually pull free.
Hem Reinforcement
Every cut edge should be double folded and heat welded or bound with a edge tape. Exposed PVC cuts allow the base fabric to unravel from the edge inward, and once started the fraying can travel across the full width of the banner.
6. Maintenance and Seasonal Adjustment
Even a correctly installed banner changes with the seasons. Planned inspection and tension adjustment extend service life and avoid the cost of emergency replacement.
Quarterly Inspection Checklist
- Check grommets for corrosion and confirm that each is still firmly seated.
- Look along welded seams for any early separation.
- Inspect the face for pinhole-type UV damage, especially on the sun-facing side.
- Retighten any anchor that has loosened under vibration.
Temperature-Driven Tension Adjustment
PVC expands in heat and contracts in cold, so tension must be adjusted with the season. In cold conditions below minus 5 C the coating becomes brittle, and tension should be eased by roughly 10 to 15 percent to avoid cracking. In summer, a banner of about 6 metres can grow by several millimetres across a large temperature swing, so spring tensioners or built-in slack are the safer choice.
Conclusion and Next Steps
A reliable installation comes down to four habits: match the gsm to the exposure, prepare the surface properly, keep tension under the 3 percent limit, and design for wind from the start. Following these steps turns a banner from a short-term risk into a durable piece of visual communication.
If you are planning a project, you can speed up the specification stage by sending the banner dimensions, the installation environment (indoor, outdoor or backlit) and the expected quantity. Based on that information a supplier can recommend a suitable weight, edge finish and accessory list before production begins.
For contractors and advertising firms working on repeat projects, factory-direct pricing and custom widths up to 5 metres make it practical to standardise on a single specification across multiple sites.
Frequently Asked Questions
Q1: What weight of flex banner should I use for a long-term outdoor installation?
For long-term outdoor use, 440 to 510 gsm or heavier is generally recommended, with UV-stabilised coating and reinforced edges to resist tearing and fading.
Q2: How tight should a banner be pulled during installation?
The surface should look flat without ripples, and total elongation should stay within about 3 percent of the original size to avoid permanent sagging.
Q3: Why do banners tear at the grommets?
Wide grommet spacing creates long unsupported sections that flutter in wind. Keeping spacing at 50 cm or less, and 40 cm in windy areas, reduces this risk considerably.
Q4: Can I install a banner in cold weather?
Installation is best carried out between 18 and 23 C. The material should not be installed below 10 C, because stiff PVC stretched in the cold develops micro-cracks.
Q5: Is a mesh banner better for windy sites?
Yes. The open weave allows air to pass through, which substantially reduces the wind force on the frame and the anchors, making it a practical option for exposed locations.